Connect to Git
Now you have a GitHub account, we will link it to your Sandbox. This allows you to access GitHub repositories directly from the Sandbox.
As we saw in the previous section, you can view files from the GitHub website. However, accessing them directly from the Sandbox allows files to be copied and edited. This is particularly useful for working on coding and analysis.
To do this, we will set Git settings using the Terminal console in the DE Africa Sandbox. You will need both a GitHub account and a DE Africa Sandbox account. Make sure you activate GitHub two-factor authentication, as you will need it to authorise Git actions from inside the Sandbox.
For more information on GitHub security mechanisms, see this article on configuring two-factor authentication or read about how to create a personal account token.
Log in to Git on the Sandbox
Log in to the Digital Earth Africa Sandbox at https://sandbox.digitalearth.africa/hub/login.
Open a Terminal window from the Launcher by clicking on the Terminal icon.
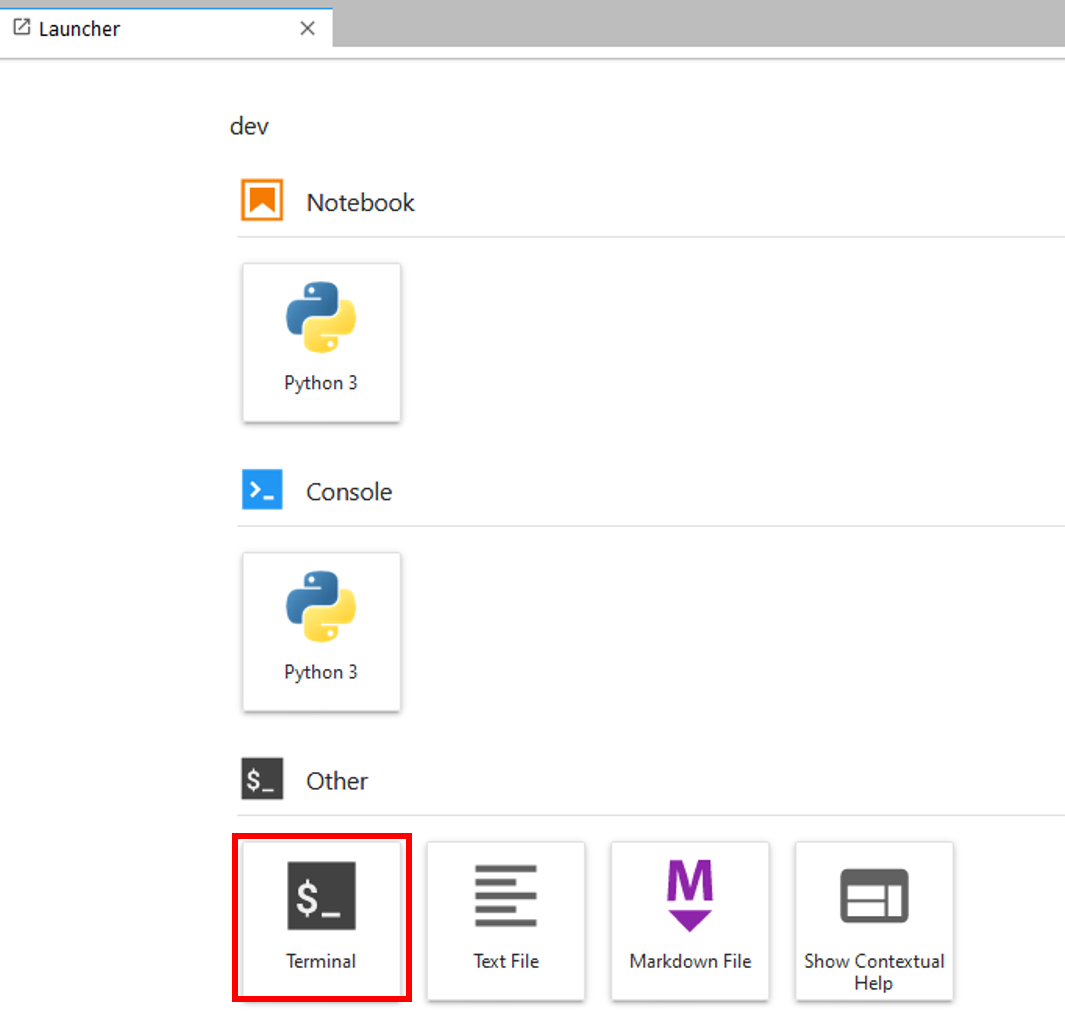
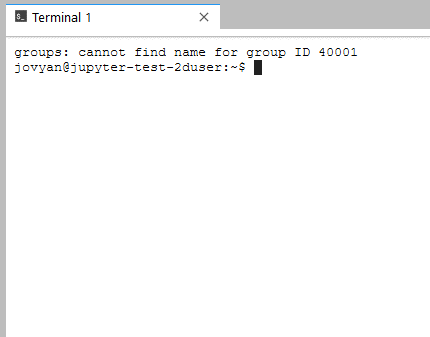
Terminal will open to show a blinking cursor. This is the command line. We will use it to set your Git login.
Type the following text, replacing
your-github-usernamewith your GitHub username. Make sure to put it inside the quotation marks.
git config --global user.name "your-github-username"
Press Enter. The command line will go to the next line.

Now set your email. Your email address has to match the email registered to your GitHub username.
git config --global user.email "email@example.com"
Press Enter.
Congratulations! You have successfully linked your GitHub account to your DE Africa Sandbox. You can now track changes and make your own code copies to edit. The next steps on forking and cloning show you how to do that.
Fork the DE Africa Sandbox Notebooks repository
Forking a repository allows you to make a personal copy of a project. This way, you do not need to be an admin or member of an open-source project to experiment on or contribute to the code.
Visit the home page of the DE Africa Sandbox Notebooks repository.
Click the Fork button in the top-right corner of the page.

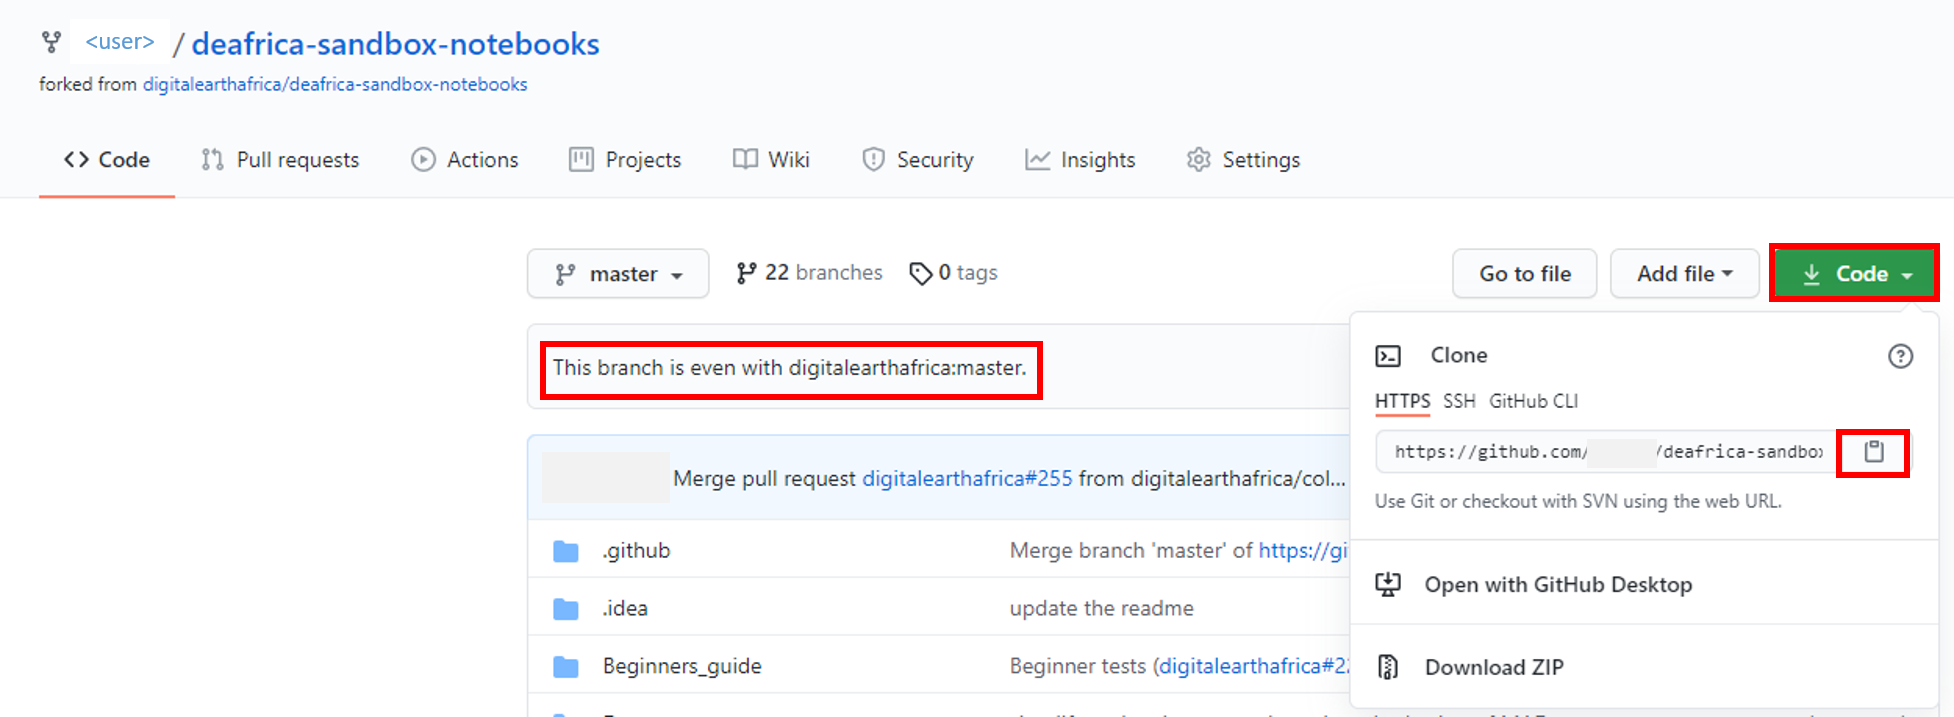
When the fork is complete, you’ll be taken to your forked copy of the repository. The header for the repository should now be <username>/deafrica-sandbox-notebooks, rather than digitalearthafrica/deafrica-sandbox-notebooks. We will refer to this repo as your fork.

This is all on the GitHub website. You can see all the files are there, but you cannot edit them from the website. We will now make a copy of your fork, or clone, inside the DE Africa Sandbox, so you can edit files there. First, we will introduce some relevant Git concepts.
Git concepts
Local: Your computer, device, or account you are working on. In this case, your local machine is your DE Africa Sandbox. This is because no one else can see or access any files in your Sandbox account (including changes you have made) unless you publish them. This makes it “local” to you. Repositories you have copied to your local machine are called “local repositories”.
Remote: Mostly used to describe repositories hosted online, such as on the GitHub website. A remote repository is often accessible by multiple team members, and may even be public-facing. In most cases, such as in our examples here, the remote repo should contain the most up-to-date version of the files.
Fork: “A fork is a copy of a repository. Forking a repository allows you to freely experiment with changes without affecting the original project.” as defined by GitHub Docs. At time of forking, the original repo and your fork are exactly the same.
Clone: Copying a remote repository to your local machine. Cloning a remote repo makes a local repo. At the timing of cloning, the remote repo and local repo are exactly the same. Any changes made to either repo after this point are not automatically synced. We will cover pushing and pulling changes between repos in the next section.
Difference between a fork and a clone: When you fork a remote repository, like when you press the Fork button, you have a remote copy of the remote repository. Cloning then allows you to make a local copy of the remote repo. This is generally done to allow editing.
Clone your Sandbox Notebooks fork
Log in to the Digital Earth Africa Sandbox.
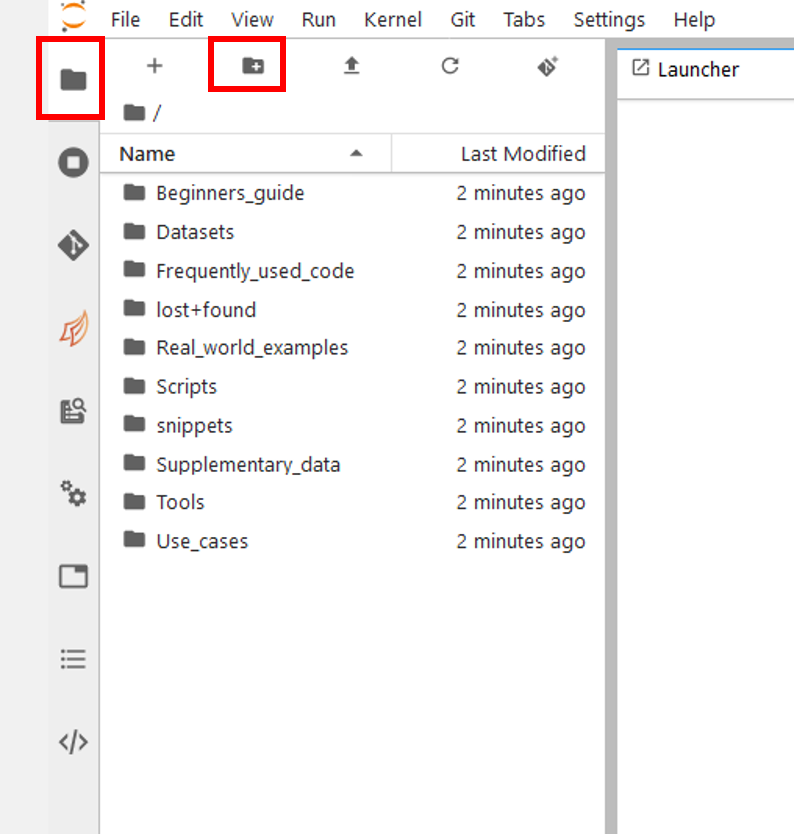
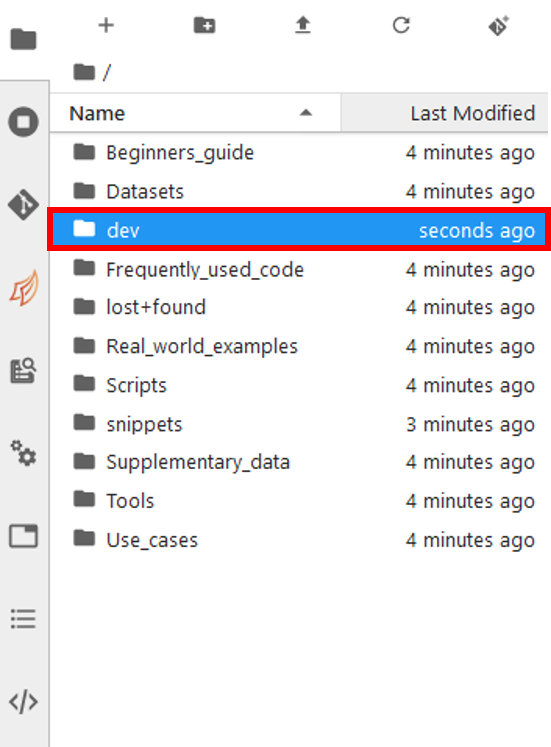
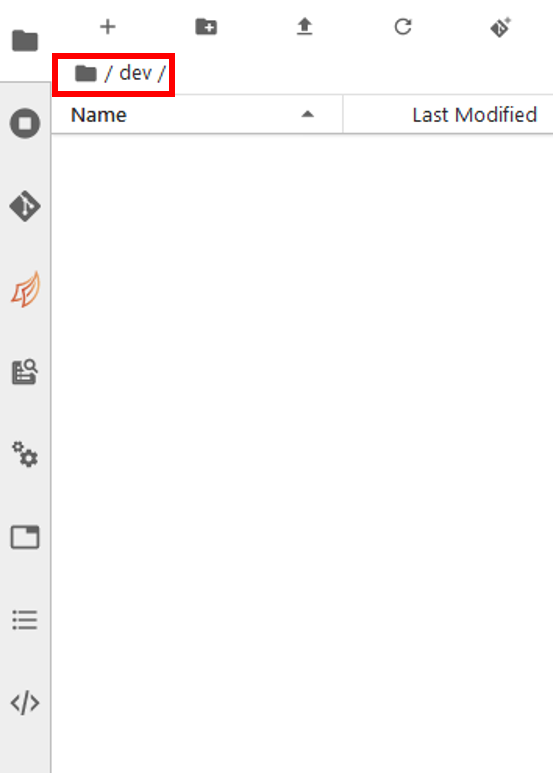
Create a new folder to store your copied repos in. By convention we will call it
dev, although you can name it something else. Click the New Folder button and name your folderdev, then double-click the folder to navigate inside it. It is currently empty.
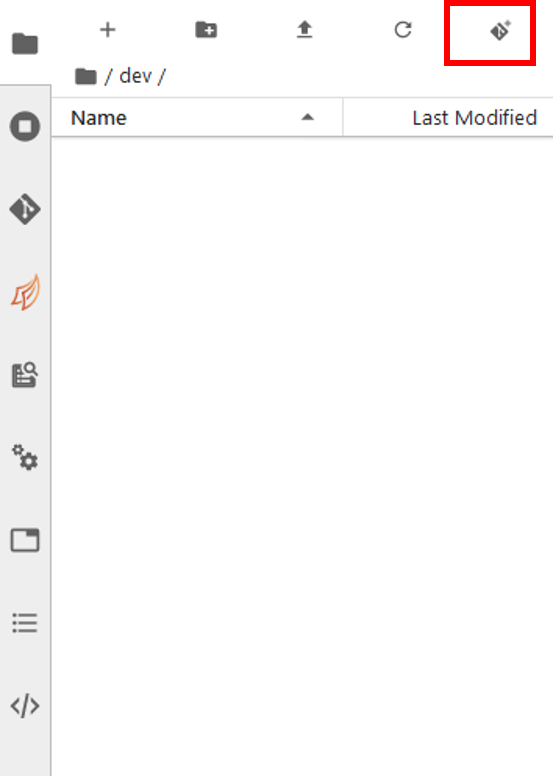
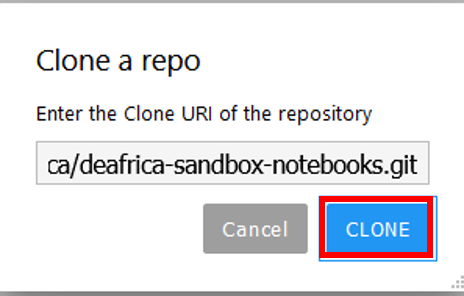
Click the last symbol on the Folder menu bar. This opens the Clone Repository option.
The Clone URI can be found on each repository’s GitHub webpage. We want to clone your fork, so we will go to your fork page. If you cannot find it you can access it from User > Your repositories in the top right corner of the GitHub website.
Near the top of the page, it should say “This branch is even with digitalearthafrica:master.” This means your fork is the same as the original Sandbox Notebooks repo.
If it does not say that, don’t worry. We will fix any inconsistencies between repos in the next part of this guide. You can continue to follow all the steps on this page.
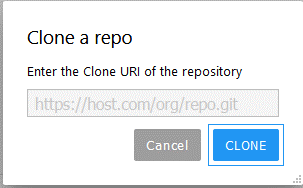
Click the Code button to open the dropdown, and click the clipboard icon to copy the URI. It should begin with https:// ....
Come back to your Sandbox page and paste the URI into the box. Click Clone.
After a few moments, a folder will appear in your
/devfolder. This is a clone of your fork of the DE Africa Sandbox Notebooks repo. Well done!
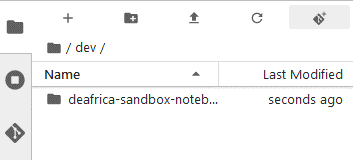
If you open the folder and explore its contents, you will see they should look exactly the same as your fork, which is the same as the remote repo on https://github.com/digitalearthafrica/deafrica-sandbox-notebooks.
Why do I have to fork then clone? Can I clone straight from
digitalearthafrica/deafrica-sandbox-notebooks? The answer is you can clone the original repo without forking, but you cannot contribute any edits from that direct clone unless you have been added as a member of the Digital Earth Africa Sandbox Notebooks repo. Forking and cloning is best practice for contributing to open-source projects as described in this article.
Find out more about cloning from remote to local in this git clone tutorial.
Terminal version: Clone the DE Africa Sandbox Notebooks repository
Skip this section if you have already completed the steps above.
This is an alternative method of cloning the repo. It is intended for users already familiar with Terminal command line; this is properly introduced to new users in the later section Git with Terminal. Steps roughly correspond to the interface version above.
Log in to the Digital Earth Africa Sandbox and open a Terminal window.
mkdir devcd devCopy the repo URI from your fork page
git clone <URI>
I need more Git help!
Git can be confusing at the start. It can look intimidating to set up, especially if you are not familiar with command-line interfaces. Take your time to read and follow this guide carefully. If you are having trouble:
Check for typos. Command-line commands are sensitive to spelling errors, whitespaces, punctuation and upper/lower case.
Look up any error messages. Git is very widely used; the Internet has plenty of resources on how to fix different error messages.
Ask a question. DE Africa is part of the Open Data Cube initiative, which has an active Slack community at http://slack.opendatacube.org/ and is a great place to ask for help.
Next steps
We defined above that at the timing of cloning, the remote repo and local repo are exactly the same. Any changes made to either repo after this point are not automatically synced. So what happens if someone else makes a change (such as a code improvement, bug fix, or new examples) to the remote repo? Your copy of the content in your Sandbox account will be out of date. The next section is about how we grab those new changes from the remote repo and download them to our local repo.
Oppositely, we can also make changes on our local repo and contribute them to the remote repo. Then, everyone who uses that code can download your improvements and additions. We will show you how to apply these changes in a way which allows everyone to see who made the changes, what the changes are, and confirm whether these changes should be added to the main repository — the version control abilities of Git.
To do both these things, we will first need to understand how to use Git to track file changes through the graphical user interface on the Sandbox. This is a great option for new Git users as an alternative to the command-line interface. Select Next to continue.